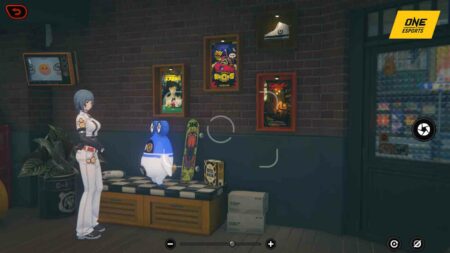
Taking photos in HoYoverse games not only helps you complete certain quests, it also allows you to capture your favorite moments and memories in-game.
Once captured, you can save these screenshots onto your local hard drive for safekeeping.
So how do you take photos in Zenless Zone Zero? It’s an important feature for players of HoYo games.

As a seasoned Genshin Impact and Honkai Star Rail player, it was initially challenging to figure this out. Unlike Genshin Impact and Honkai Star Rail, which have obvious camera icons on their menu page, I couldn’t find the equivalent in ZZZ.
So to help you cut to the chase and save precious time, here’s a ONE Esports guide on how to take photos in Zenless Zone Zero.
Step-by-step guide on how to take photos in Zenless Zone Zero
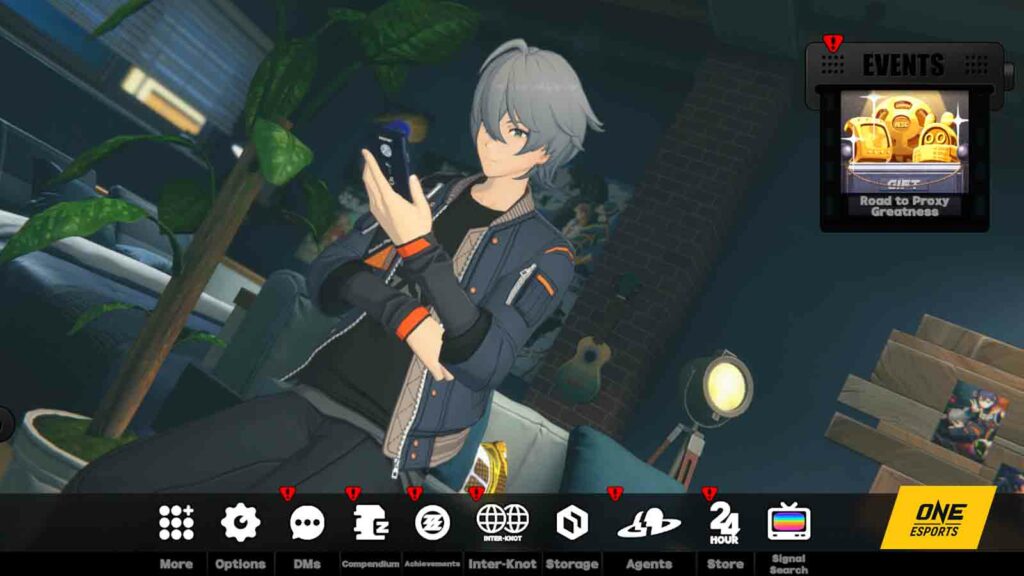
When you click to expand the Tab or click “Esc” to access the top menu, you’ll quickly notice there’s no camera icon found anywhere, not even when you click “More” or “Options”.
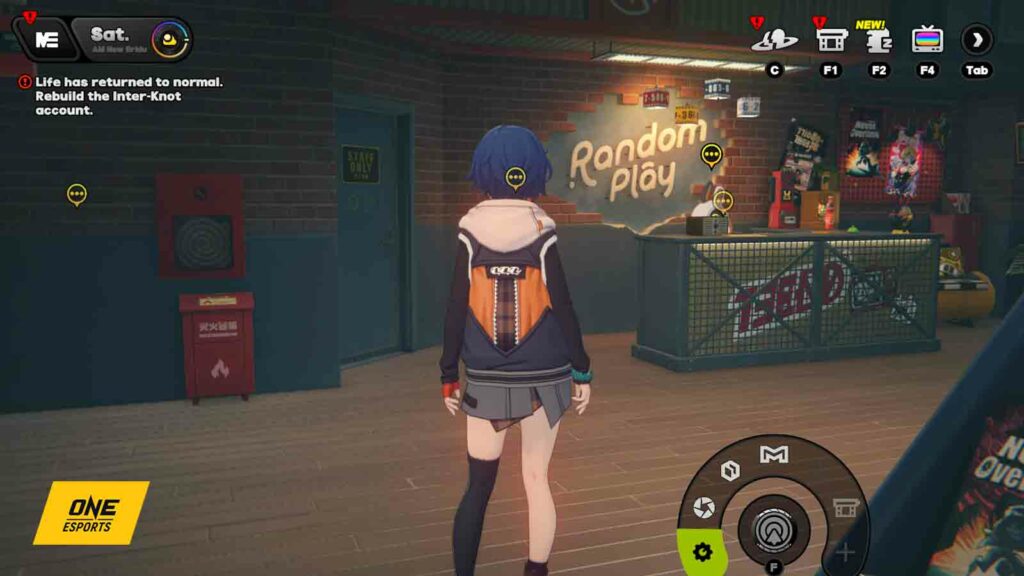
We recommend following these steps to take photos in Zenless Zone Zero for PC users:
- Hold the “alt” button on your keyboard.
- Hover your mouse over the “F” icon at the bottom right corner of your screen.
- Long press left left-click mouse button on the “F” icon, which opens a mini menu. Immediately let go of the alt button the moment the semi-circle pops up. (If you hold too long, you’ll accidentally click on settings.)
- Move your mouse directionally left and right. This lets you choose between the options indicated by the lime green background.
- To access the camera, select the second circle icon.
- Once you’re in photo-taking mode, click on the same circle icon to take a picture.
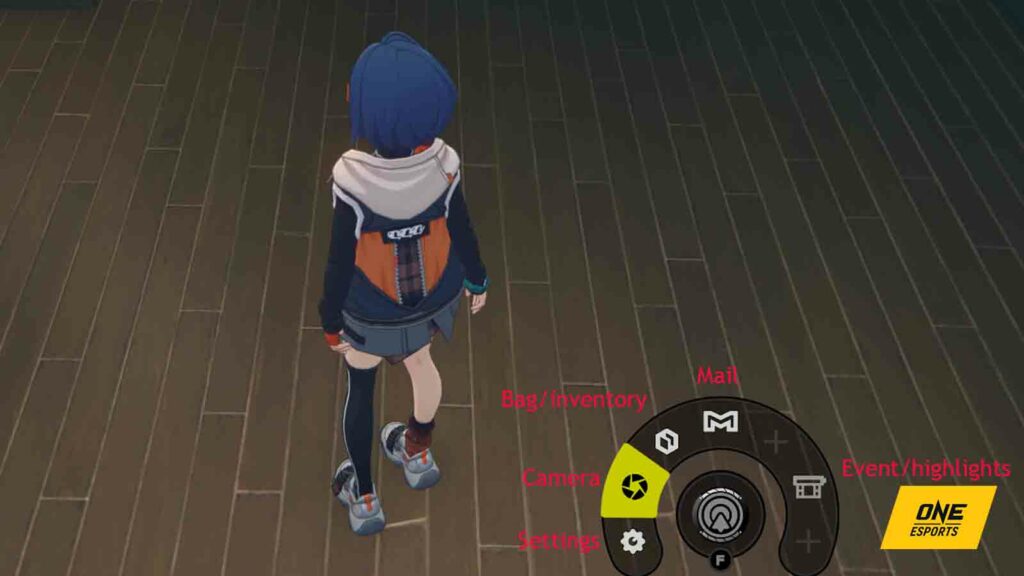
We’ve listed down default quick menu options in the image above, which include settings, inventory, and mail.
In camera mode, you can adjust the zoom at the bottom by clicking the plus and minus signs. Alternatively, use your mouse’s scroll wheel to zoom in and out.
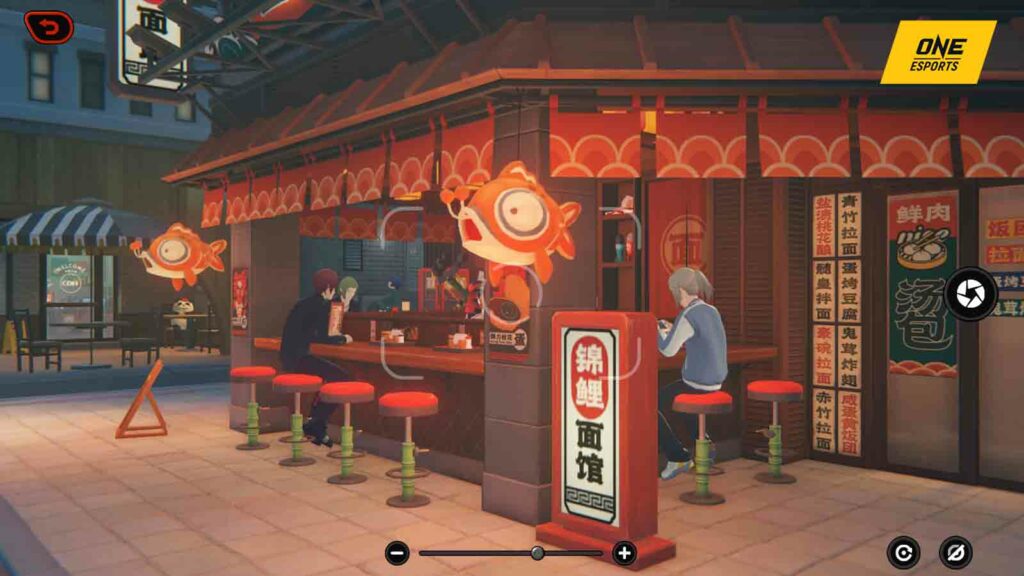
Click on the eye at the bottom right corner to hide the interface if you need to assess your angle for a clean look. Next to it is the redo button which resets your camera to its default settings if you ever need to revert.
Once you’re ready to take the photo, click on the circle icon on the right.
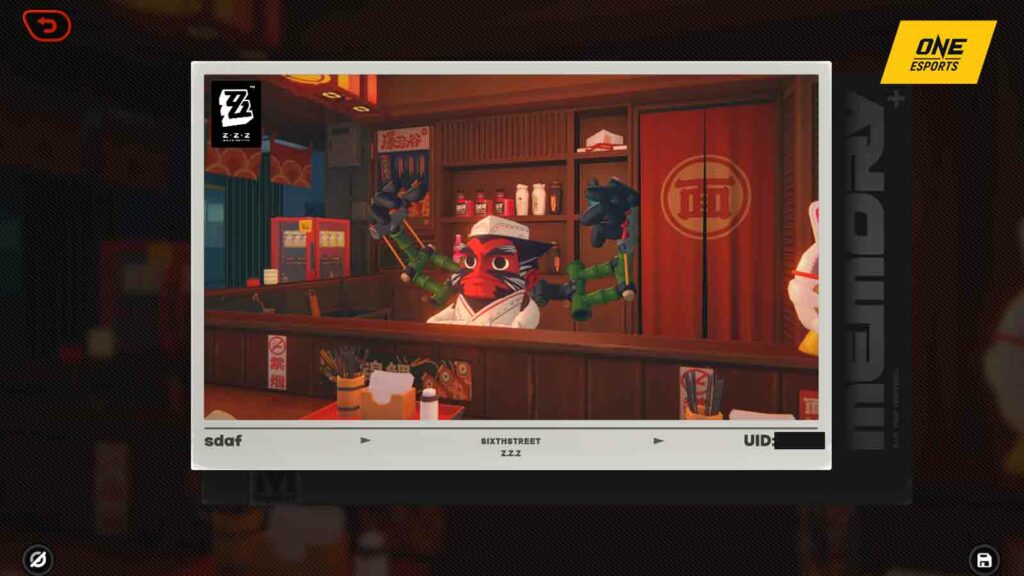
Tada! You’ll end up in this Polaroid-designed interface to show that the picture has been taken. It includes the location, stated in the middle, your IGN on the left, and your UID on the right.
If you want your IGN and UID to be hidden, click on the eye on the bottom left. To save the photo to your local hard drive, click on the save icon at the bottom right.
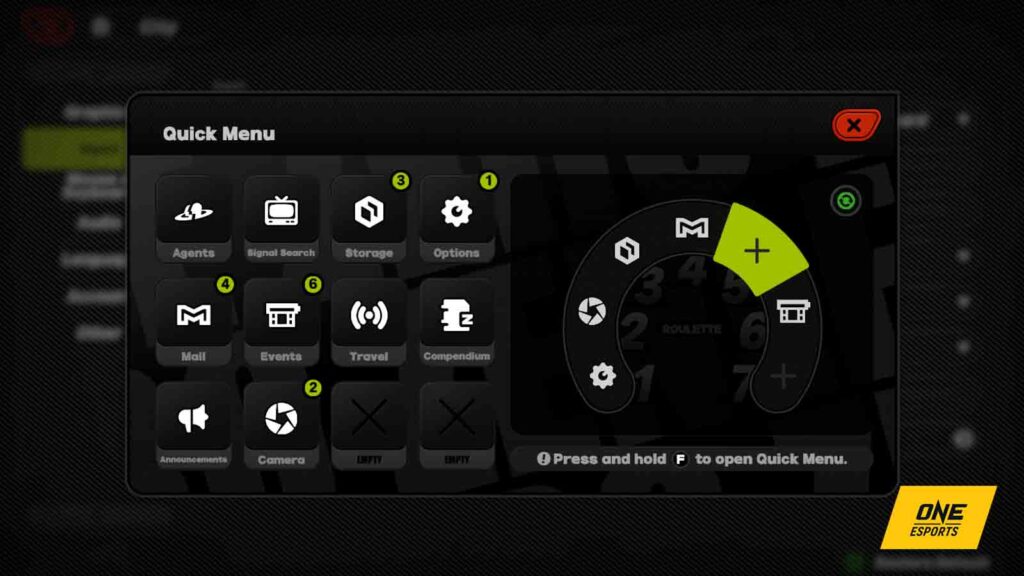
You can add more to the Quick Menu by clicking the plus sign. Customize and move icons around according your preference from one to seven.
READ MORE: Is Zenless Zone Zero difficult? What the game does to help you overcome first-time jitters
